
I’m exploring the VR(Virtual Reality) world and the possibilities that it’s going to give us as developers to solve problems or create new applications.Here I’m going to share my experiences during this road. In this post, I’m going to render a scene in 3ds Max and view it in my Gear VR with my Samsung S6 Edge.
Let me make it clear I’m not an expert in 3ds Max. I used to work with it more than a decade ago for some simple projects and it has changed a lot since then but still, I can find my way around it.
I should admit rendering for VR is really simpler than I thought.
Setup Gear VR
You need to have a Samsung Gear VR and a phone that works with it. Oculus app will automatically be downloaded to your phone and just follow the steps it needs to make it work.
Setup 3ds Max
First I downloaded the Trial Version of 3ds Max 2017 from Autodesk. The installation was very simple and straightforward.
Steps to render and view
After installation, I run the application for the first time and it gave me a choice to select a template! Awesome! This made my life so easy, no need to create a box and render a plain old 3d box. I picked the “Sample Studio Scene”
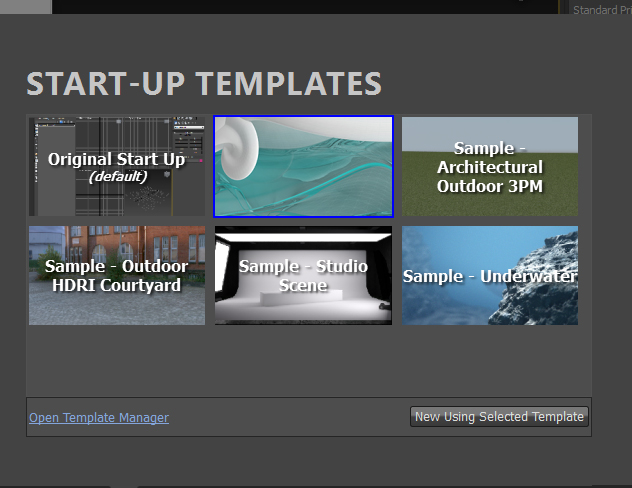
The scene is neat and simple. I don’t want to change anything.
I searched the google read the help and watched some videos so let’s start.
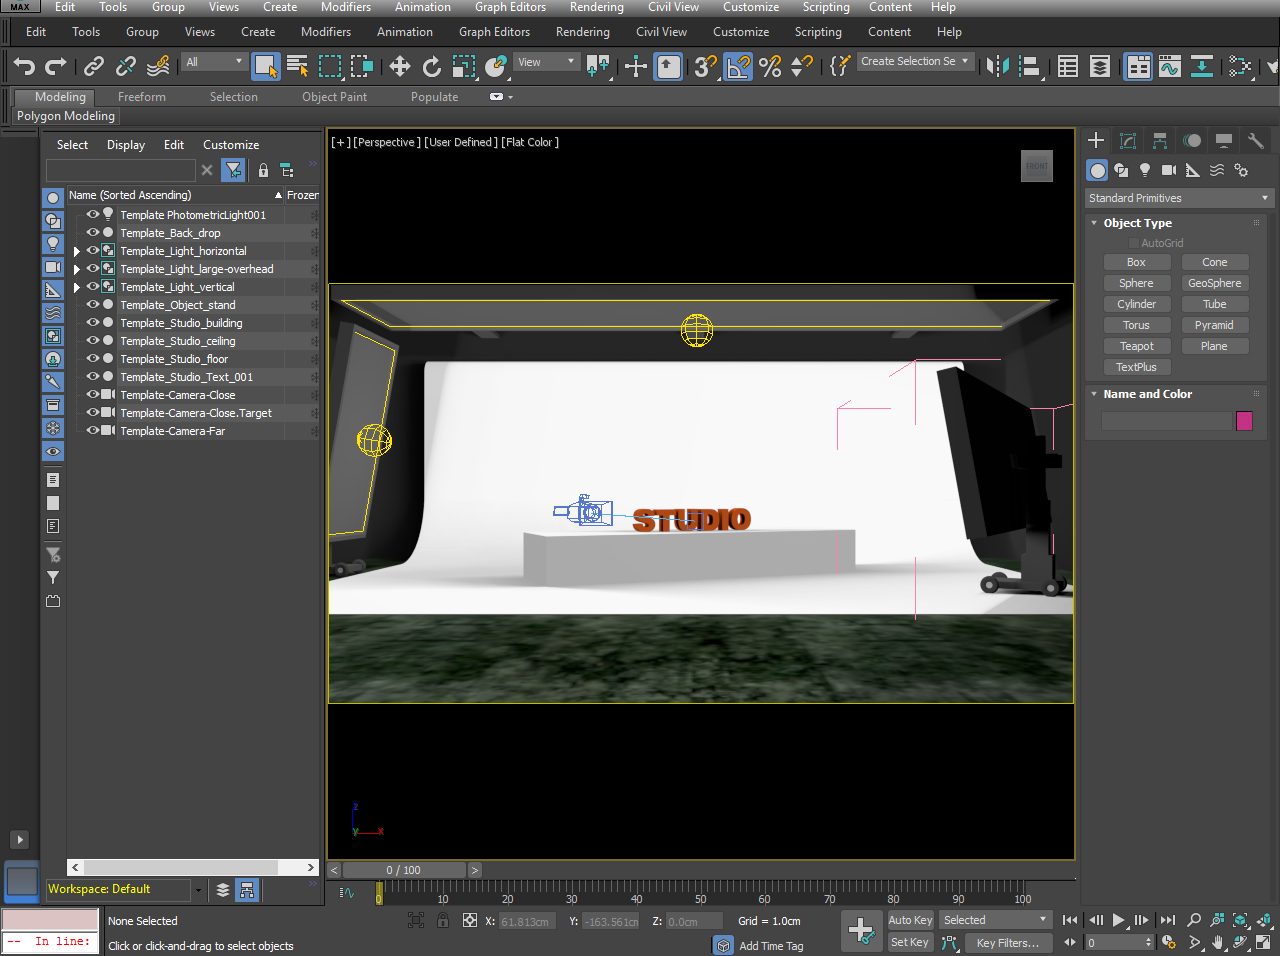
First, we should select the “Template-Camera-Close” for the current Viewport. This will give us a better view after rendering.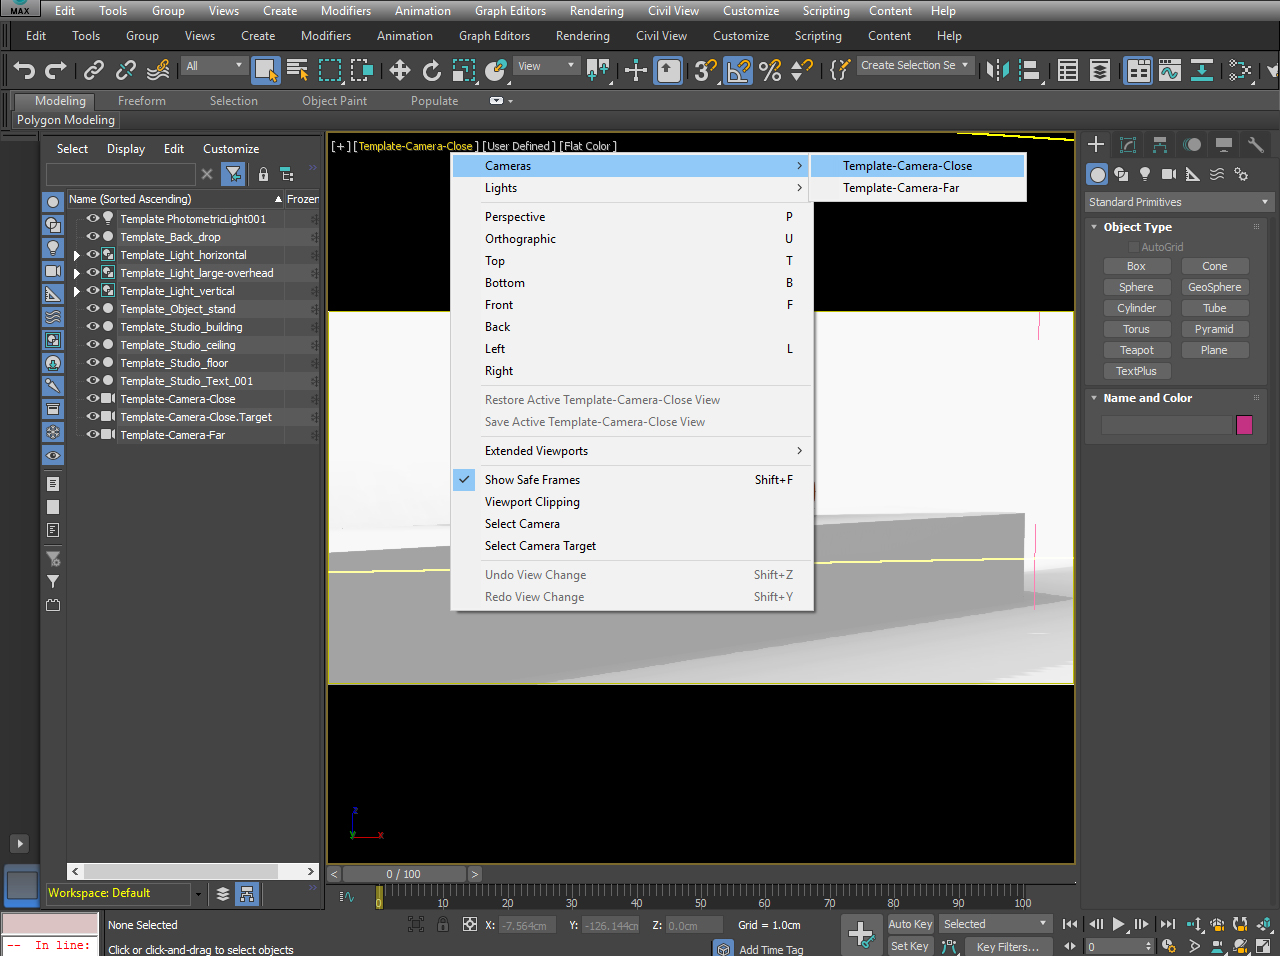
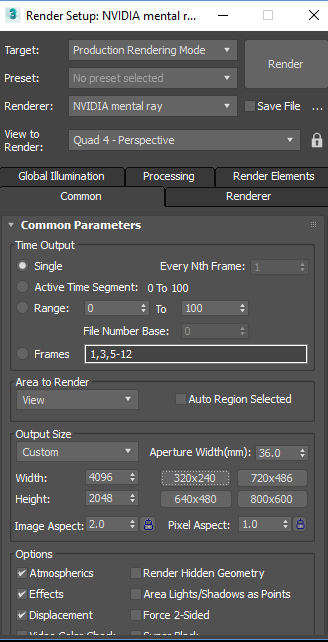
Then we need to open the “Render Setup” Window.
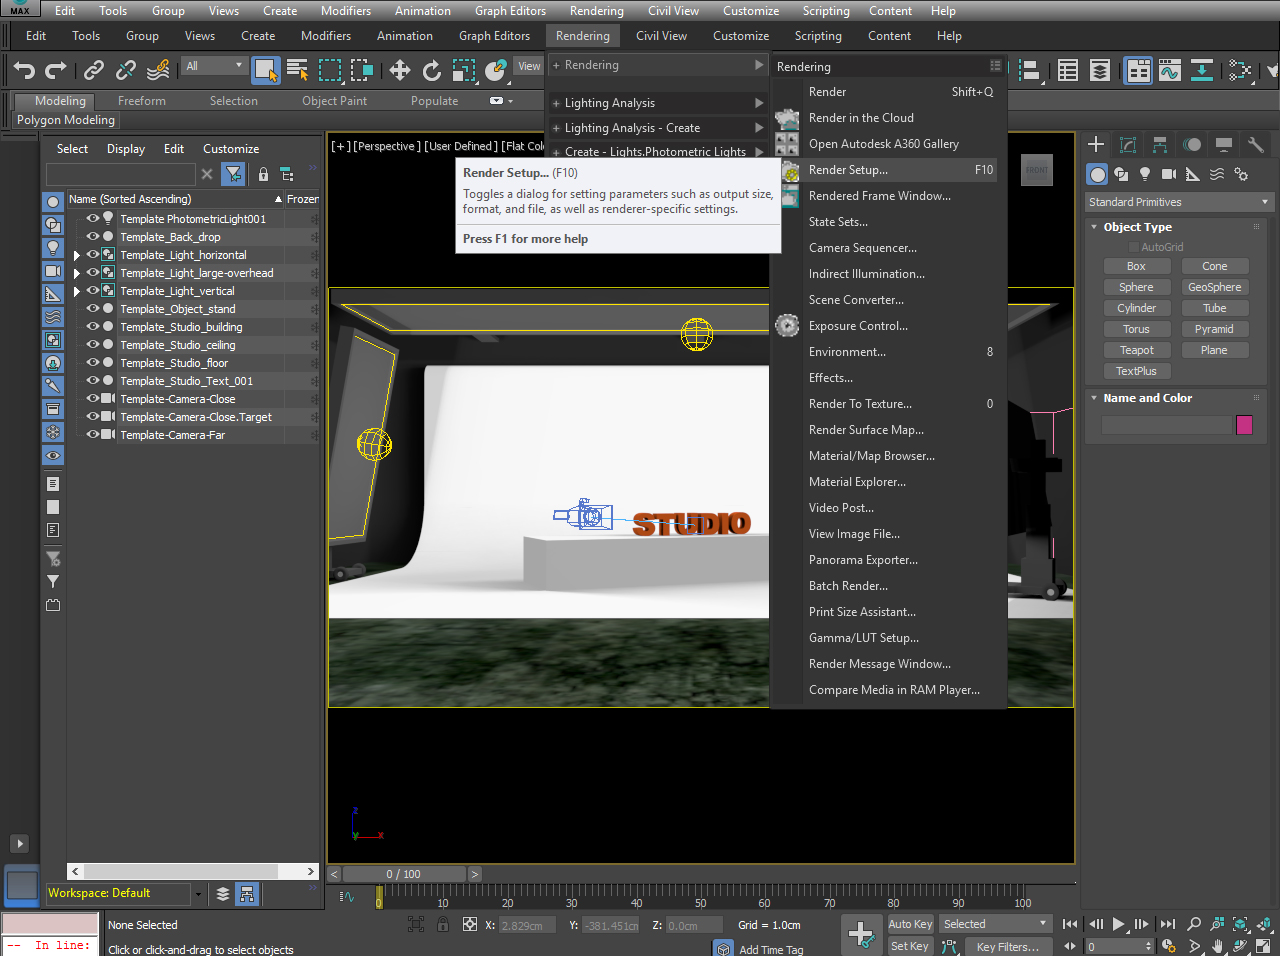
In render setup screen I didn’t change anything my renderer by default was “NVIDIA mental ray”.
In the “Output Size” section we should select Custom and set the width to 4096 pix and Height to 2048 pix. the aspect ratio is 2:1.
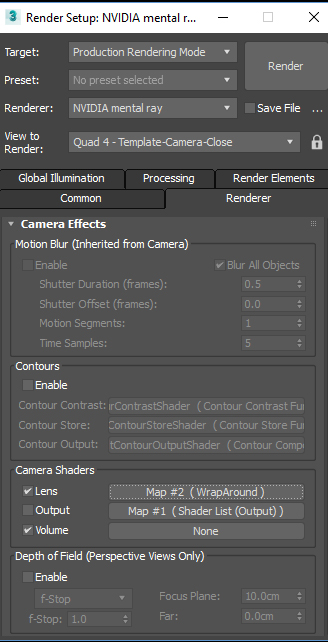
The last thing, from the “Renderer” Tab we should change the Lens to “WrapAround”.
And that’s it! now hit the “Render” and be patient. After the render is finished save the image as “.jpg”.
If you don’t want to do all the above steps you can download the final render from here.
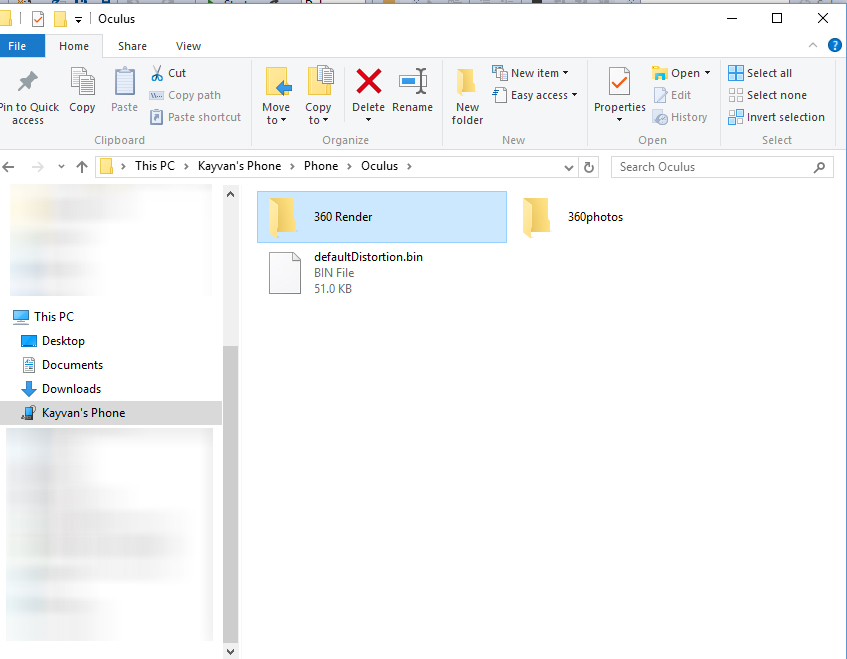
Now we should transfer the 360 rendered image to the phone.
we can do it with a USB cable and then copy the image to the phone. There is folder phone base folder called “Oculus” we can create a new folder called “360 Render” inside Oculus folder and copy the .jpg file there.
Now put your “Gear VR” on and go to “Oculus 360 Photos” you can find this file inside “My Gallery”.
Enjoy your lovely creation in Virtual Reality world.
My next sample will be a simple Unity app for Gear VR.
Comments are closed.